
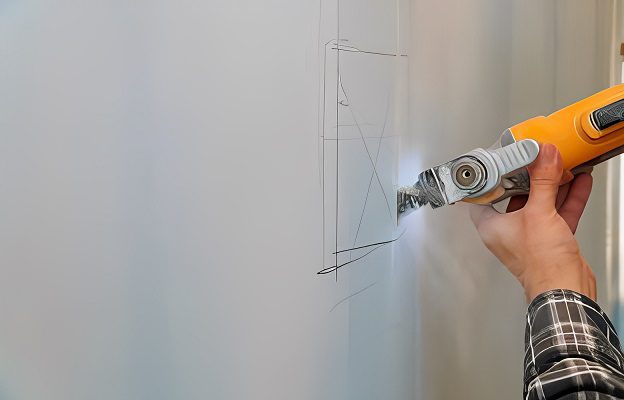
Mastering the technique of cutting drywall to run electrical wires is essential for any homeowner or DIY enthusiast. Not only does this skill ensure a seamless electrical installation, but it also guarantees safety and compliance with building codes.
In this comprehensive guide, we’ll walk you through step-by-step instructions, tools needed, and best practices to efficiently and safely navigate this crucial task. Whether you’re embarking on a renovation project or addressing electrical upgrades, this tutorial will equip you with the knowledge and confidence to tackle the job with precision.
Most electrical wires in homes are concealed behind drywall to safeguard and hide unattractive wire bundles. Occasionally, the need arises to thread wires through walls, such as when adding an outlet or switch to a room. This task of running electrical wires within closed walls can be quite laborious and is not typically a favorite among do-it-yourself enthusiasts. It can be inefficient and time-consuming to remove entire sheets of drywall just to access the wires.
Instead, the goal is to minimize the drywall cut while still providing a sufficient opening for tools and hands. However, there are instances where cutting across an entire room is necessary for running wires.
Handling Electrical Wiring
Prioritizing the handling of electrical wiring is essential, even if it means compromising the aesthetics of your drywall. Understanding how drywall, studs, and electrical wires interact can make this side project more manageable. Additionally, it’s crucial to note that most electrical work, including running new wires, typically requires an electrical permit in many communities. If you’re uncomfortable with DIY electrical wiring projects, hiring an electrician is always the safer option.
What You’ll Need
Equipment / Tools
- Voltage tester
- Stud finder
- Drywall jab saw
- Chalk line
- Circular saw
- Multi-tool (optional)
- Fish tape
- Hot glue
Materials
- Plastic sheeting/drop cloth
- Painter’s tape or electrical tape
- Drywall for patching
- Paper drywall tape
- Drywall compound tape
- Backer supports
- Medium-grit sandpaper
- Fine sanding sponge (optional)
Instructions
Preparing for Cuts
Prior to cutting, it’s important to understand that walls may contain various elements like electrical wires, plumbing pipes, insulation, cross-bracing, and construction debris. For your safety, ensure you wear eye, hearing, and respiratory protection when cutting into the wall.
Turn Off the Power
When working with cutting tools, enclosed spaces, and electrical wires, the first rule is always to deactivate the electrical circuit supplying power to the area. Cut off all power to that section of your home, even if you believe there are no wires in the wall. This step is crucial because locating electrical wires can often be a hit-or-miss process.
Protect Room From Drywall Dust
To minimize drywall dust while cutting, set up a dust barrier using plastic sheeting and painter’s tape, stretching from floor to ceiling. Place a drop cloth under the cutting area, which can be easily disposed of once the project is finished.
Pinpoint the Wire
Professionals use scanners with radar technology to find concealed wires. A typical stud finder won’t locate wires, but it can help you identify studs, which can be valuable in locating wires without a scanner. Some modern stud finders are equipped to detect wiring as well.
If you can’t use a stud finder, it’s worth noting that most outlets and some switches have multiple sets of wires. Examining the box can help you determine where the wires enter, either at the top, bottom, or occasionally the sides. This provides a starting point for tracing the wires without accidentally cutting them.
Here are some additional tips for locating wires in your walls:
- Between wall outlets, electrical wires typically run horizontally, around 12 inches from the floor.
- Wiring often extends vertically from light switches.
- Wiring tends to run parallel or perpendicular to the joists.
- Wire rarely runs diagonally or at other angles.
Small Runs: Cutting Between Alternating Studs
To run electrical wire horizontally in walls, it’s useful to know that most wall studs are either 16 inches or 24 inches apart.
Tip: Since electrical cables follow lines, it’s beneficial to make long, narrow cuts with a manual jab saw. However, running electrical wire through longer walls may require more than manual cuts.
Find the studs and mark their locations with painter’s tape or electrical tape, as you will be cutting between the studs. For interior walls or walls without insulation, you can cut between alternating stud cavities, reducing the number of holes you need to make in the wall.
Create 4-inch by 4-inch access holes in the drywall to insert your hands and a drill for cutting holes in the studs to thread the wire. Try to drill near the center of the studs or joists to minimize damage to the wall. Use metal protection plates if you need to drill near the edges to safeguard the wires.
Use fishing tape to guide the wire blindly through the closed-up cavity into the bored holes in the studs. Ensure the hole in the stud is adequately sized to accommodate the wire. Cut any loose wires from the cable to create a sharp end for easier threading.
Large Runs: Cutting Entire Walls
For longer wire runs, you may have to cut across the entire wall, even over the studs. Although messier, this is the quickest way to create long, narrow sections of drywall.
Tip: A multi-tool with a wood blade is a neater, albeit slower method. Plunge cut directly into the drywall, even over the studs.
To cut across an entire room, hallway, or other long distances, mark two chalk lines 4 inches apart. Equip a cordless circular saw with a used blade and set the depth to about 5/8-inch (for 1/2-inch thick drywall). Ensure that the depth is correctly set, as this is crucial.
Final Step: Patch the Drywall
After installing the electrical wire and testing circuits and devices, deactivate the electricity once again to patch the drywall using patches with backers.
Create a patch for each hole that matches the hole’s size, cutting straight in at a 90-degree angle. Alternatively, you can use the bevel cut patch method by beveling the hole to a 45-degree angle and the patch piece in the opposite direction. Before placing the patch, scuff away some gypsum from the cut sides to recess the patch about 1/16 inch into the wall.
Apply backer supports (using wood paint stirring sticks) inside the hole with hot glue. Remove the back paper from the patch piece, causing it to recess about 1/16 inch into the wall. Fill the patches with drywall compound and allow them to dry thoroughly. Smooth the patches with medium-grit sandpaper and finish by using a fine sanding sponge.
FAQ
To cut an outlet hole in drywall, start by locating the studs and marking the outlet’s position. Then, use a drywall saw to cut along your marked lines.
To minimize mess when cutting drywall, create a dust barrier in the room using plastic sheeting and use drop cloths that can be rolled up and removed after cutting.
Yes, the front of the outlet box should be even with the front of the drywall.
tag: # How to Cut Drywall to Run Electrical Wires